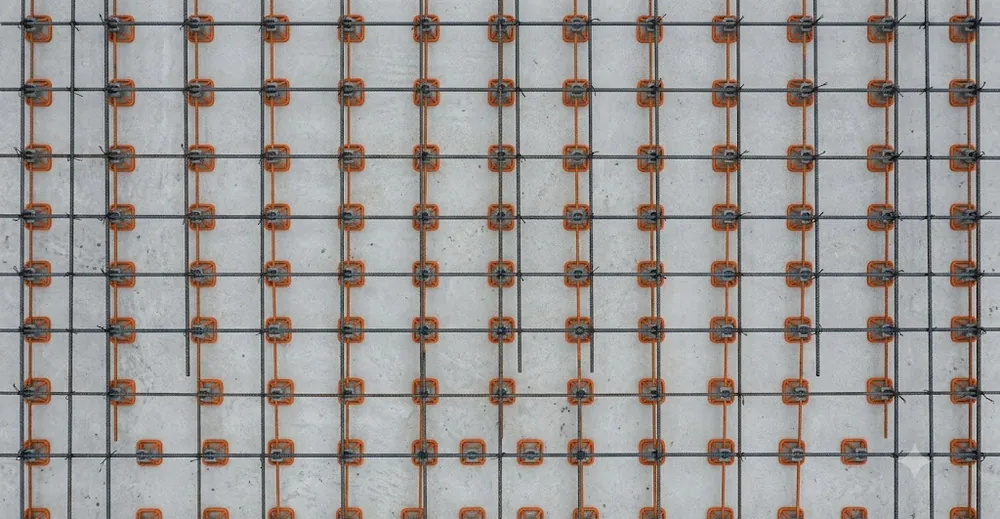
We are a manufacturer, not the engineer of record, so treat everything here as field practice. When your drawings or the CRSI recommendations call for something tighter, follow the spec. The goal is to help you buy the right quantity without over-ordering or leaving bars sagging.
Why spacing matters before you even pour
Chair spacing controls one thing above all: cover. Concrete cover protects steel from corrosion, fire, and bond loss, and it only holds if the bars stay put while crews walk the mat and the pump hose drags across it. Too few supports and the bars deflect between them, cover drops below tolerance, and you get a mat that dips in the middle of every bay.
Over-spacing is the more common mistake we see on incoming orders. A buyer counts the mat area, divides by a generous grid, and ends up short once the crew adds edge rows and doubles up under traffic lanes. Under-spacing wastes money but rarely fails inspection. The safe habit is to size the grid to the bar, not to the budget.
There is a second reason spacing matters early: it drives your purchase order. Chairs ship by the thousand, and the difference between a 3 ft grid and a 4 ft grid on a large slab is thousands of pieces. Getting the grid right on paper means one order instead of a rush reorder mid-pour.
Rebar chair spacing by bar size
Smaller bars bend more easily, so they need closer support. A #3 or #4 bar is whippy and will sag under its own weight over a long span, while a #7 or larger stays rigid between wider supports. The grid should follow the stiffness of the steel sitting on it, and that stiffness climbs fast with diameter.
Here is the field baseline we hand to buyers who ask for a starting point. These are typical support spacings for the bar being carried, not code minimums:
| Bar size (imperial) | Approx. metric | Typical chair spacing | Grid guidance |
|---|---|---|---|
| #3 - #4 (10M) | 10-13 mm | ~3 ft (0.9 m) | Close grid, whippy bars sag |
| #5 - #6 (15M-20M) | 16-19 mm | ~4 ft (1.2 m) | Standard flatwork grid |
| #7 - #8 (22M-25M) | 22-25 mm | ~5 ft (1.5 m) | Stiffer bars span farther |
| #9 and up (30M+) | 29 mm+ | 5 ft+ (1.5 m+) | Confirm against spec, heavy mats |
Read the table as the support spacing for whichever bar is resting on the chair, usually the bottom layer in a slab. When two bar sizes cross, size the grid to the smaller, more flexible bar, because that is the one that sags. And when the drawings show a support schedule, that schedule wins over any rule of thumb, every time.
One caveat from the shop floor: epoxy-coated and galvanized bars are no stiffer than black steel, so coating does not change spacing. What it can change is the chair itself, since some jobs require plastic-tipped or all-plastic supports to protect the coating. Spacing stays the same; the support material is the variable.
Edge, corner, and traffic allowances
Spacing is not uniform across a slab. Bar ends and slab edges cantilever past the last line of support, so you add a row of chairs near every free edge to stop the ends from dropping. A good habit is to keep the last support within about 1 ft (0.3 m) of a bar end or a slab edge, then run the regular grid inward from there.
Traffic lanes are the other place the grid tightens. Wherever crews will walk repeatedly, wheel a buggy, or drag the pump hose, the bars take abuse and the supports get kicked. We tell buyers to plan for a denser row, sometimes half the normal spacing, along the main access paths and around pour access points. It is cheaper to add chairs than to reset a mat that has been trampled flat.
Corners and openings deserve the same attention. Around block-outs, drains, and re-entrant corners the bar layout gets busy and the spans get short, so a couple of extra supports keep everything at cover while the concrete goes in. None of this shows up if you only multiply area by grid, which is exactly why estimates come in low.
Point supports versus continuous supports
There are two families of support, and the choice changes both your layout and your count. Point supports are individual chairs, one piece under a bar intersection or along a bar at intervals. Continuous supports are long members, like slab bolsters, that run the full width of a bay and carry a whole line of bars at once.
Point supports, the classic rebar chairs, give you flexibility and suit mats where bars cross in a clear grid. You place them on the intersections and space them per the table above. They are simple to estimate and simple to ship, which is why most residential and light commercial slabs run on them.
Continuous supports shine under closely spaced bars and heavy top mats. A slab bolster running across the bay supports every bar it crosses, so instead of a chair at each intersection you set a line of bolsters at intervals, often 4 to 5 ft apart, and let each one do the work of a whole row. On congested decks the continuous approach can cut piece count and speed placement, though the linear metres add up, so price both ways before you commit.
Which is cheaper depends on bar spacing. Tight bars favour continuous supports because a single bolster replaces many chairs. Wide bars favour point supports because you are not paying for bolster length between distant bars. When a buyer is unsure, we run both counts on the actual bar layout and let the numbers decide.
How to estimate chairs per square metre
Here is the method we use to turn a slab area into a chair order. It is a grid calculation, and it takes about a minute per bay. Start with your chosen spacing from the table, convert it to metres, and treat the chairs as a square grid across the slab.
The core formula is simple. Chairs per square metre equals 1 divided by (spacing in metres squared). At a 1.0 m grid that is 1 chair per m². At a 1.2 m grid it is about 0.7 per m². At a 0.9 m grid it climbs to about 1.2 per m². Multiply that density by your slab area and you have the base count.
| Grid spacing | Chairs per m² | Chairs per 100 m² |
|---|---|---|
| 0.9 m (~3 ft) | ~1.2 | ~120 |
| 1.0 m (~3.3 ft) | 1.0 | 100 |
| 1.2 m (~4 ft) | ~0.7 | ~70 |
| 1.5 m (~5 ft) | ~0.45 | ~45 |
Work a quick example. Say you have a 500 m² slab with #5 bar on a 1.2 m grid. Base count is 500 × 0.7, which is 350 chairs. Now add the allowances: budget 10 to 15 percent for edges, corners, and traffic doubling, so add roughly 40 to 55 pieces. Round up and order about 400. That buffer covers breakage, mislaid pieces, and the extra rows the crew adds on site.
Two honest cautions on this method. First, it assumes the bottom layer; a supported top mat needs its own count with high chairs or standees, so run the calculation twice for a two-layer slab. Second, the buffer is not padding for its own sake. Sites lose chairs, and running out mid-pour is far costlier than a box of spares. We would rather a customer finish with a few left over than stop a truck.
If you want a sanity check before ordering, send us the slab area, bar size, and layer count. We will run the grid, add sensible allowances, and quote a quantity you can hand straight to the crew.
A quick pre-order checklist
Before the purchase order goes out, confirm five things. What bar sizes sit on the chairs, since that sets the grid. Whether the top mat needs support too, since that doubles part of the count. What cover height the chairs must hold, since that sets the chair height, not the spacing. Whether coated bar demands plastic-tipped supports. And whether the spec or CRSI recommendations override any rule of thumb here.
Nail those five and your order will match the pour. Miss one, usually the top mat or the edge allowance, and you are back on the phone for a rush box while the crew stands around. A few minutes with the drawings up front saves that call.
Frequently asked questions
How far apart should rebar chairs be spaced?
For most flatwork, space rebar chairs on a 3 to 4 ft grid (about 1.0 to 1.2 m). Tighten to roughly 3 ft under small #3 to #4 bars, and you can open up to about 5 ft under #7 and larger. Always defer to the project support schedule or CRSI recommendations when they call for closer spacing.
How many rebar chairs do I need per square metre?
Divide 1 by your grid spacing in metres, then square it. A 1.0 m grid gives 1 chair per m², a 1.2 m grid gives about 0.7, and a 0.9 m grid gives about 1.2. Multiply by slab area, then add 10 to 15 percent for edges, corners, and traffic. Order the rounded-up figure.
Does bar size really change the spacing?
Yes. Thin bars flex and sag between supports, so #3 and #4 bars need a closer grid, around 3 ft. Heavier #7 and larger bars stay rigid and span farther, often 5 ft or more. When two sizes cross, size the grid to the smaller bar, because that is the one that deflects and drops your cover.
When should I use slab bolsters instead of individual chairs?
Use continuous slab bolsters when bars are closely spaced or you have a heavy top mat, because one bolster supports every bar it crosses and can cut piece count. Individual chairs suit wider bar grids where paying for bolster length between distant bars makes no sense. On congested decks, price both layouts before deciding.
Do I need extra chairs at edges and walkways?
Yes, always. Bar ends and slab edges cantilever past the last support, so add a row within about 1 ft of every free edge. Tighten the grid, sometimes by half, along traffic lanes, buggy paths, and pour access points where crews will trample the mat. Budget 10 to 15 percent above the base count for these.
Order the right quantity the first time
Get the grid right on paper and the pour goes smoothly. Size the spacing to your smallest bar, add for edges and traffic, run the per-square-metre count, and buffer 10 to 15 percent. If you would rather we check the math, send your slab area, bar sizes, and layer count, and we will quote a quantity built to match your layout. Request a quote and we will turn it around quickly.
