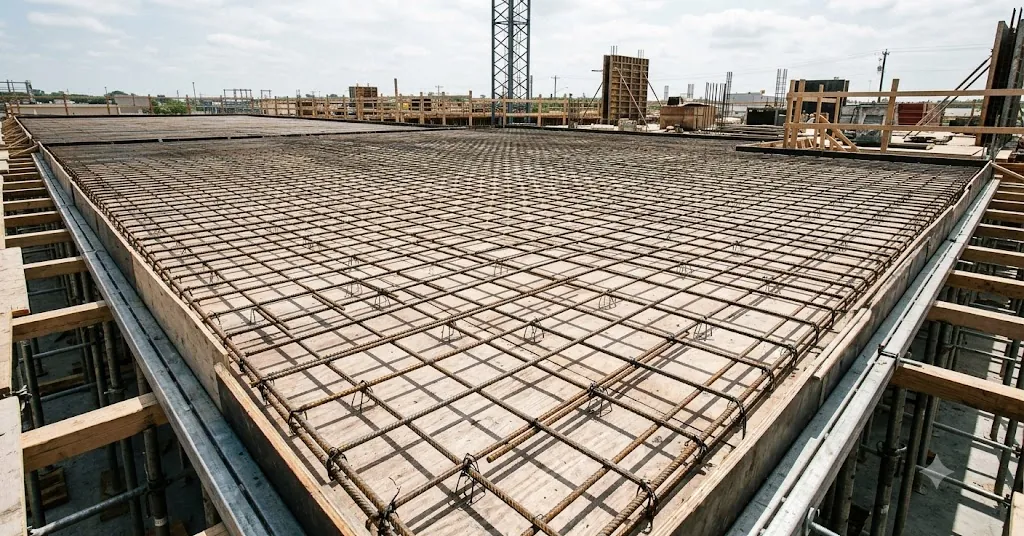
At Leeter, a wire and mesh manufacturer in Dingzhou, Hebei that has been exporting to North America and Europe since 2006, we talk with plenty of first-time crews and DIY builders. The questions are almost always the same. What wire do I use? How tight is tight enough? Why does my tie keep spinning loose? This guide answers those questions with clear steps, real tools, and honest advice you can use on your first slab, footing, or wall.
Why tying rebar matters
Tying rebar does not make the steel structurally stronger. The ties exist to hold every bar in its designed position while workers walk the mat and while wet concrete is placed and vibrated. If bars shift, your spacing and concrete cover go wrong, and cover is what protects steel from rust over the life of the structure.
Think of ties as temporary clamps. Once the concrete cures, the bond between steel and concrete does the real work. That is why you do not need to overtighten every knot until the wire snaps. You need enough tension to keep intersections from sliding, rotating, or lifting when someone steps on the grid.
For beginners, this mindset removes a lot of pressure. You are positioning steel, not welding a bridge. Consistent, snug ties at the right intersections beat a few crushing-tight ties scattered randomly across the mat.
What tools and materials do you need?
The beginner setup for tying rebar is short: annealed tie wire, a cutting and twisting tool, gloves, and something to keep bars off the ground. You can start with pliers and a spool, then upgrade to faster tools once your hands learn the motion.
Here is a simple starter list and what each item does.
| Item | Purpose | Beginner note |
|---|---|---|
| Rebar tie wire | The wire you wrap and twist | 16 or 16.5 gauge black annealed is the common all-around choice |
| Pincer pliers or lineman's pliers | Cut and twist by hand | Cheapest way to learn the feel of a tie |
| Wire twister / pigtail tool | Speeds up hand twisting | Good middle step before power tools |
| Rebar twisters or battery tie gun | Fast, consistent ties | Worth it once you are tying all day |
| Work gloves | Protect hands from wire ends | Cut tails are sharp; do not skip these |
| Bar chairs or dobies | Hold rebar off the subgrade | Keeps cover correct while you tie |
Annealed tie wire is soft and bendable, which is exactly what you want. Bright galvanized or stainless wire exists for special corrosion situations, but plain black annealed wire covers most footings, slabs, and walls. If you are buying your first spool, precut wire lengths or bagged loops save time because you skip the cutting step entirely.
How to tie rebar step by step: the snap tie
The snap tie is the first knot every beginner should master, and it works for most flat mat and grid connections. Follow these steps in order and repeat until the motion feels automatic.
- Cut your wire. Use a length of roughly 6 to 8 inches for standard bar sizes. Precut wire removes this step.
- Fold it in half. Bend the wire so you have a doubled strand with a small loop at one end and two tails at the other. Many crews skip the fold and use a single strand; both work, so learn what your team prefers.
- Position the wire at the crossing. Slide the wire diagonally under the point where the two bars intersect, so it wraps the underside of both bars.
- Bring the ends up and around. Pull both ends up over the top of the intersection so the wire hugs the X where the bars cross.
- Grab both ends with your pliers or tool. Pinch the two tails together right at the top of the crossing.
- Twist. Turn the wire clockwise. Two to four twists is usually enough. Stop when the tie is snug and the bars no longer slide.
- Trim and tuck. Cut the excess tail and bend the sharp end down toward the concrete so it does not poke up near the surface.
The most common beginner error here is over-twisting. If you keep spinning past snug, the wire work-hardens and snaps, and you start over. Stop the moment the intersection stops moving. A good snap tie takes just a few seconds once the motion clicks.
How do you make a saddle tie?
The saddle tie wraps around the bars on two sides instead of one diagonal pass, so it resists movement in more directions than a snap tie. It is the go-to when a joint needs to stay put under heavier foot traffic or during vibration, such as wall mats and column cages.
Here is the beginner version, step by step.
- Cut or grab a wire slightly longer than you would for a snap tie, since the saddle wraps more steel.
- Pass the wire under the bottom bar on one side of the intersection.
- Bring both ends up and over the top bar, so the wire straddles, or saddles, the crossing like a horseshoe.
- Wrap each end around so the two tails meet on top of the intersection.
- Twist the tails together clockwise until the tie is firm and the bars are locked in position.
- Trim the excess and bend the tail down away from the concrete surface.
The saddle tie holds better against rotation because it grips the bars from underneath and over the top. Beginners should learn the snap tie first for speed, then add the saddle tie for connections that need extra grip. A variation called the wrap-and-saddle adds an extra turn around one bar for even more hold, but you can leave that for later.
Which intersections do you actually tie?
You rarely tie every single crossing, and knowing which ones to skip saves real time. On many flat slabs, crews tie roughly every other intersection in a staggered pattern, which is enough to keep the mat stable while staying efficient.
Your project drawings or a supervisor should confirm the pattern for your specific job, because edges, corners, and heavily loaded areas often need more ties than the field of the mat. As a general habit, beginners tie perimeter and corner intersections more densely, then stagger ties across the interior.
One honest caution: local codes, engineers, and inspectors set the real requirements. When in doubt, tie more rather than less at edges, and always ask before you assume a pattern. The few extra seconds are cheaper than a failed inspection.
What mistakes do beginners make most?
The mistakes below show up on nearly every first job, and all of them are easy to fix once you know to watch for them. Slowing down for the first hour to build good habits pays off across the whole pour.
- Over-twisting until the wire breaks. Stop at snug. More turns do not equal a better tie.
- Leaving sharp tails sticking up. Untucked ends can poke through near the concrete surface. Bend them down.
- Ties too loose to hold. If bars still slide, add another twist or two. The intersection should not rotate.
- Wrong wire gauge. Too thin and it snaps; too thick and it fights you. Start with 16 or 16.5 gauge annealed.
- Ignoring concrete cover. Ties keep bars in place, but you still need chairs and spacers to hold the correct cover.
- Skipping gloves. Wire ends cut fingers fast. Protect your hands from the start.
Another quiet mistake is tying in an awkward posture. Kneel or crouch so your wrists can twist freely. If you are reaching and straining, your ties get sloppy and your back pays for it by lunchtime.
How can beginners tie rebar faster?
Speed comes from consistency, not force, and the fastest crews look almost relaxed. The biggest single upgrade for most beginners is moving from pliers to a dedicated tool once the basic motion is reliable.
A few practical tips that help right away:
- Use precut wire or loops so you are not measuring and cutting on every tie.
- Keep wire on your hip or in an apron so you never walk back to the spool.
- Learn one knot well before switching between styles. Muscle memory beats variety early on.
- Try a twister tool. A rebar twister or pigtail tool cuts wrist fatigue and standardizes each twist.
- Consider a battery tie gun for large jobs. They cost more, but on big slabs they change the math on labor and hand strain.
The honest tradeoff is cost versus volume. If you are tying a single backyard footing, pliers and a spool are plenty. If you are on your third slab of the week, a tool pays for itself in speed and spared wrists. Match the gear to the size of the work in front of you.
Frequently asked questions
What gauge wire is best for tying rebar by hand?
For most beginner work, 16 or 16.5 gauge black annealed tie wire is the sweet spot. It is soft enough to twist easily by hand yet strong enough to hold intersections snug. Heavier bars or demanding joints may call for a slightly thicker wire, so check your project's requirements.
How tight should a rebar tie be?
Tie until the intersection is snug and the bars can no longer slide or rotate, then stop. You are clamping steel in position, not maximizing tension. Over-twisting work-hardens the wire and causes it to snap, which just forces you to start the tie over.
Do I have to tie every intersection?
No. Many flat mats are tied in a staggered pattern, often around every other crossing, with denser ties at edges and corners. Your drawings, supervisor, or local inspector set the real pattern, so confirm before you start rather than guessing on a full mat.
Snap tie or saddle tie: which should I learn first?
Learn the snap tie first. It is faster and handles most flat grid connections, making it the ideal beginner knot. Add the saddle tie once you are comfortable, since it grips from underneath and over the top and holds better against rotation on walls and cages.
Can I tie rebar without special tools?
Yes. A pair of pincer or lineman's pliers and a spool of annealed wire are enough to learn every knot in this guide. Tools like twisters and battery tie guns simply make the work faster and easier on your hands once you are tying in volume.
Start with the right wire
Tying rebar is a hands-on skill, and the fastest way to improve is to cut some wire and practice the snap tie until it feels natural. Get the basics right, keep your ties snug rather than crushing, and protect your concrete cover with chairs, and your first grid will hold up just fine.
If you are sourcing materials for a project, Leeter supplies black annealed rebar tie wire and twister tools for crews across North America and Europe. Tell us your gauge, volume, and packaging needs and we will help you match the right product. Request a quote and we will get back to you with options built for your job.
