At Hebei Leeter Import and Export Co., Ltd ("Leeter"), we have supplied form stakes, wire ties and forming accessories to contractors across North America and Europe since 2006. This guide walks through what each component does, how the pieces work together, and how to set your forms to line and level so the concrete comes out where you want it.
What formwork actually has to do
Wet concrete is heavy and it pushes. A cubic yard weighs roughly two tons, and while it is still fluid it presses outward against every form face like a liquid. That pressure grows with pour height and with how fast you place the mix. The colder the concrete and the faster the lift, the higher the pressure climbs before the mix stiffens.
So formwork has two jobs at once. First, it must hold the shape you want, the exact line, level and dimension of the finished concrete. Second, it must resist the outward and uplift forces that try to spread, tip or float the forms during the pour. Every stake, tie, clip and brace exists to serve one of those two jobs. Once you see the system that way, choosing components stops being guesswork.
What do form stakes do in formwork?
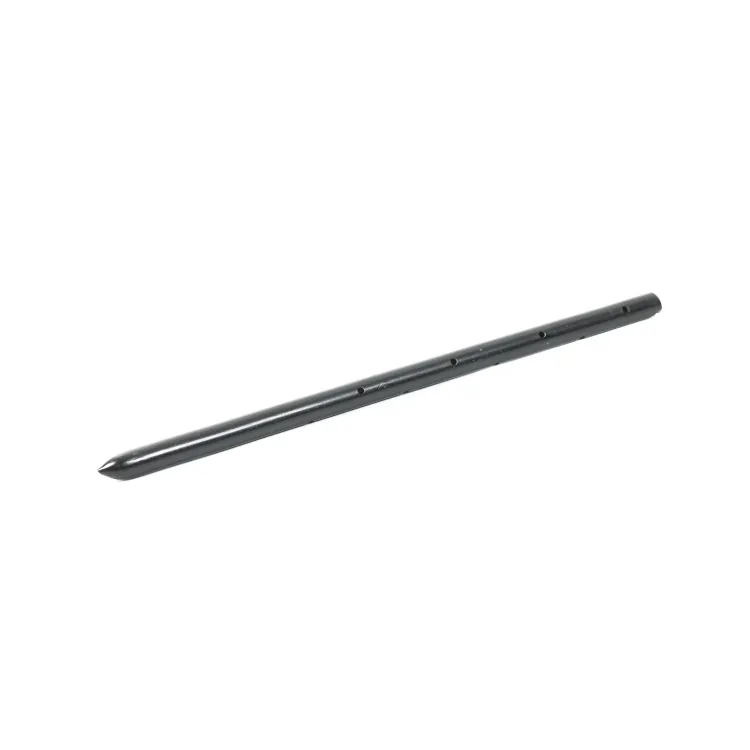
Form stakes are the anchors of the whole system. Drive them into the ground alongside your form boards or panels, then nail or screw through the stake holes into the form. The stake resists the outward push of the concrete and stops the form from sliding, kicking out or tipping over. They also give you a fixed point to pull the form to when you set line and level.
Most stakes are round or flat steel bar, punched with nail holes along the length and pointed at one end for driving. Round stakes, often 3/4 inch, suit lighter curb and slab-edge work. Flat stakes give more surface for nailing and hold better in loose soil. Length matters more than anything: you want enough steel in the ground to resist the load, and enough above ground to nail off the full form height.
A rough field rule is that at least half to two thirds of the stake should sit below grade. A 24-inch stake anchoring a 2x8 form leaves plenty in the ground; a short stake in soft fill will lever right out under pressure. Space stakes closer where pressure is highest, near the base of tall forms and at every joint between boards.
| Form height | Typical stake length | Rough stake spacing |
|---|---|---|
| Slab edge, 4 to 6 in | 18 to 24 in | 3 to 4 ft |
| Curb / low wall, 8 to 12 in | 24 to 30 in | 2 to 3 ft |
| Footing form, 12 to 16 in | 30 to 36 in | 2 ft |
| Soft or sandy soil | Add 6 to 12 in | Tighten one spacing step |
Treat these as starting points, not gospel. Soil condition, pour speed and form stiffness all shift the numbers. When in doubt, add stakes. Steel is cheaper than a blowout.
How do ties and clips hold panels together?
Ties and clips do the internal work that stakes cannot reach: they hold opposing form faces at the correct spacing and stop the walls from spreading apart under pressure. On a wall pour, the two form faces want to bow outward. A tie runs through the concrete and connects both faces, taking that tension so the wall stays the right thickness top to bottom.
Snap ties, loop ties and wall ties all work on the same principle. The tie holds the two panels at a fixed spread while a wedge, bolt or clip locks it against the outside waler or panel. After the pour, you snap or break the tie back below the surface and patch the hole. Spacing follows the same pressure logic as stakes: closer near the base, wider up top where the mix has begun to set.
For plywood and panel forms, plywood clips join adjacent sheets so the joint stays flush and does not telegraph a line into the finished face. They also share load between panels so no single sheet carries the pressure alone. A tie handles the big spreading force; a clip handles the alignment and the local joint. Both matter for a clean, dimensionally correct wall.
The honest field truth is that ties fail quietly. One under-torqued wedge or one skipped tie row, and you get a bulge you only see after strip-out. Walk the form before every pour and check each tie is seated and each clip is closed.
Why does bracing keep the forms plumb?
Bracing is what keeps the whole assembly from leaning, racking or floating out of position while the concrete is placed. Stakes anchor the base, but a tall form still wants to lean under load, especially if the pour is one-sided. A diagonal brace runs from the top of the form down to a stake in the ground, turning that lean into a fixed triangle. Triangles do not move; that is the entire point.
Set braces at an angle, usually around 45 degrees, from the upper form back to a well-driven stake. Nail or screw both ends solid. On longer runs, brace every few feet and add a horizontal waler to spread the load so no single stud takes the whole push. Kickers, short braces at the base, stop the bottom of the form from sliding out while the top is held by the diagonal.
Here is a small but common mistake: contractors brace against the direction they expect the push, but forget uplift and vibration. A concrete vibrator working near a form loosens soil and shakes nails. Over-brace rather than under-brace, and re-check bracing after the first lift of concrete is in and the form has taken its first real load.
How do you set formwork to line and level?
Setting to line and level is where the forms earn their keep, because the concrete will copy whatever you build, flaws and all. Start from a control line or offset line snapped from your layout. Set your corners first, pull a string line between them along the top of the form, and bring every board or panel to that string before you nail off the stakes.
Level comes next. Run a laser or a level along the top edge and shim or adjust the stakes until the top of the form matches your finish grade or reveals a consistent slope for drainage. On a slab edge, the top of the form is usually your screed line, so a wavy form means a wavy slab. Take the time here; it is far cheaper than grinding concrete later.
A simple setting sequence
- Snap your working line and mark corners.
- Set and stake the corners to line and level first.
- Pull a string line along the top between corners.
- Bring intermediate forms to the string, then stake.
- Check for plumb on wall forms with a level.
- Add ties and clips at pressure spacing.
- Add diagonal braces and kickers.
- Walk the whole form and re-check before the pour.
Common setting mistakes
Skipping the string line is the big one. Eyeballing a long run always drifts, and the drift shows up as a curved edge nobody wanted. Under-driving stakes in soft ground is next: the form looks fine dry, then walks outward under load. Finally, nailing off before checking level locks in every high and low spot, so always confirm line, level and plumb before the last nails go in.
Choosing components for the job
Match the component to the load, not to habit. A short slab edge needs light stakes and simple staking; a full-height footing or wall needs longer stakes, proper ties and real bracing. Reusing forms across many pours favors steel stakes and reusable clips over nailed-and-scrapped lumber, because the labor saved on setup repays the accessory cost quickly.
Soil is the other deciding factor. Firm, undisturbed ground holds a stake well, so standard length and spacing work. Loose fill, sand or wet ground needs longer stakes, tighter spacing, or both. If a stake pushes in by hand, it will not hold two tons of pushing concrete. When you plan a job, count your ties and clips by spacing and pour height, then add a margin, because running short mid-pour is not an option once the truck is on site.
If you want help sizing stakes, ties and clips for a specific pour, our team can spec a package from your form dimensions and soil conditions. Request a quote with your form height, run length and pour details and we will point you to the right components.
Frequently asked questions
How deep should form stakes be driven?
Drive at least half, and ideally two thirds, of the stake below grade so it can resist the outward push of the concrete. In firm soil a 24-inch stake for a 2x8 form is common. In loose, sandy or wet ground, use a longer stake or tighten spacing, because a shallow stake levers out under load.
What is the difference between ties and clips?
Ties run through the concrete and hold opposing form faces at the correct spread, taking the tension that tries to spread a wall. Clips, such as plywood clips, join adjacent panels at the surface to keep joints flush and share load between sheets. Ties handle spreading force; clips handle alignment and the joint.
How far apart should I space form stakes?
Spacing depends on pour height, pour speed and soil. As a rule, place stakes 3 to 4 feet apart on slab edges and tighten to 2 feet on footing forms, with a stake at every board joint. Pressure is highest near the base of tall forms, so close the spacing there and add stakes in soft ground.
Do I always need bracing on formwork?
Short slab-edge forms often need only stakes, but any tall or one-sided form needs bracing to stay plumb. A diagonal brace from the top of the form to a driven stake turns a leaning load into a fixed triangle. Add kickers at the base against sliding and re-check bracing after the first lift of concrete.
How do I stop form blowouts during a pour?
Blowouts come from too few stakes, missed or loose ties, and pouring too fast. Set stakes and ties at proper spacing, seat every wedge and clip, and brace against both push and uplift. Pour in controlled lifts rather than filling a tall form in one shot, and walk the form to check every connection before the concrete arrives.
Formwork is not complicated once you see it as three cooperating jobs: stakes anchor and brace, ties and clips hold the panels, and bracing keeps it all plumb to line and level. Build with that logic and your pours come out square, straight and the right thickness. If you need stakes, ties or clips matched to your next job, request a quote and our team at Leeter will help you spec the right package.
